Run trains & spot problems
Work in progress: This section is still a work in progress — content is being added and revised continuously.
A track plan only comes alive with trains — and only then does the plan check test radii and usable lengths against your real operation: without your own trains it pauses those checks. In this final part you define a train, place it on the rails and read the findings.
Soon: The “Operations” tool, where you set up and place trains here, is not available yet.
Starting point: any runnable plan — easiest is your oval with a siding from Part 1. (Every part of the series builds on the oval, not on the previous one.)
Step 1 — What runs on your layout?
Open the Operations tool and add a typical train in the “Trains” section (loco + cars) — from the plan check, “Define trains →” takes you straight there. From now on the check compares radii and usable lengths against exactly this train.
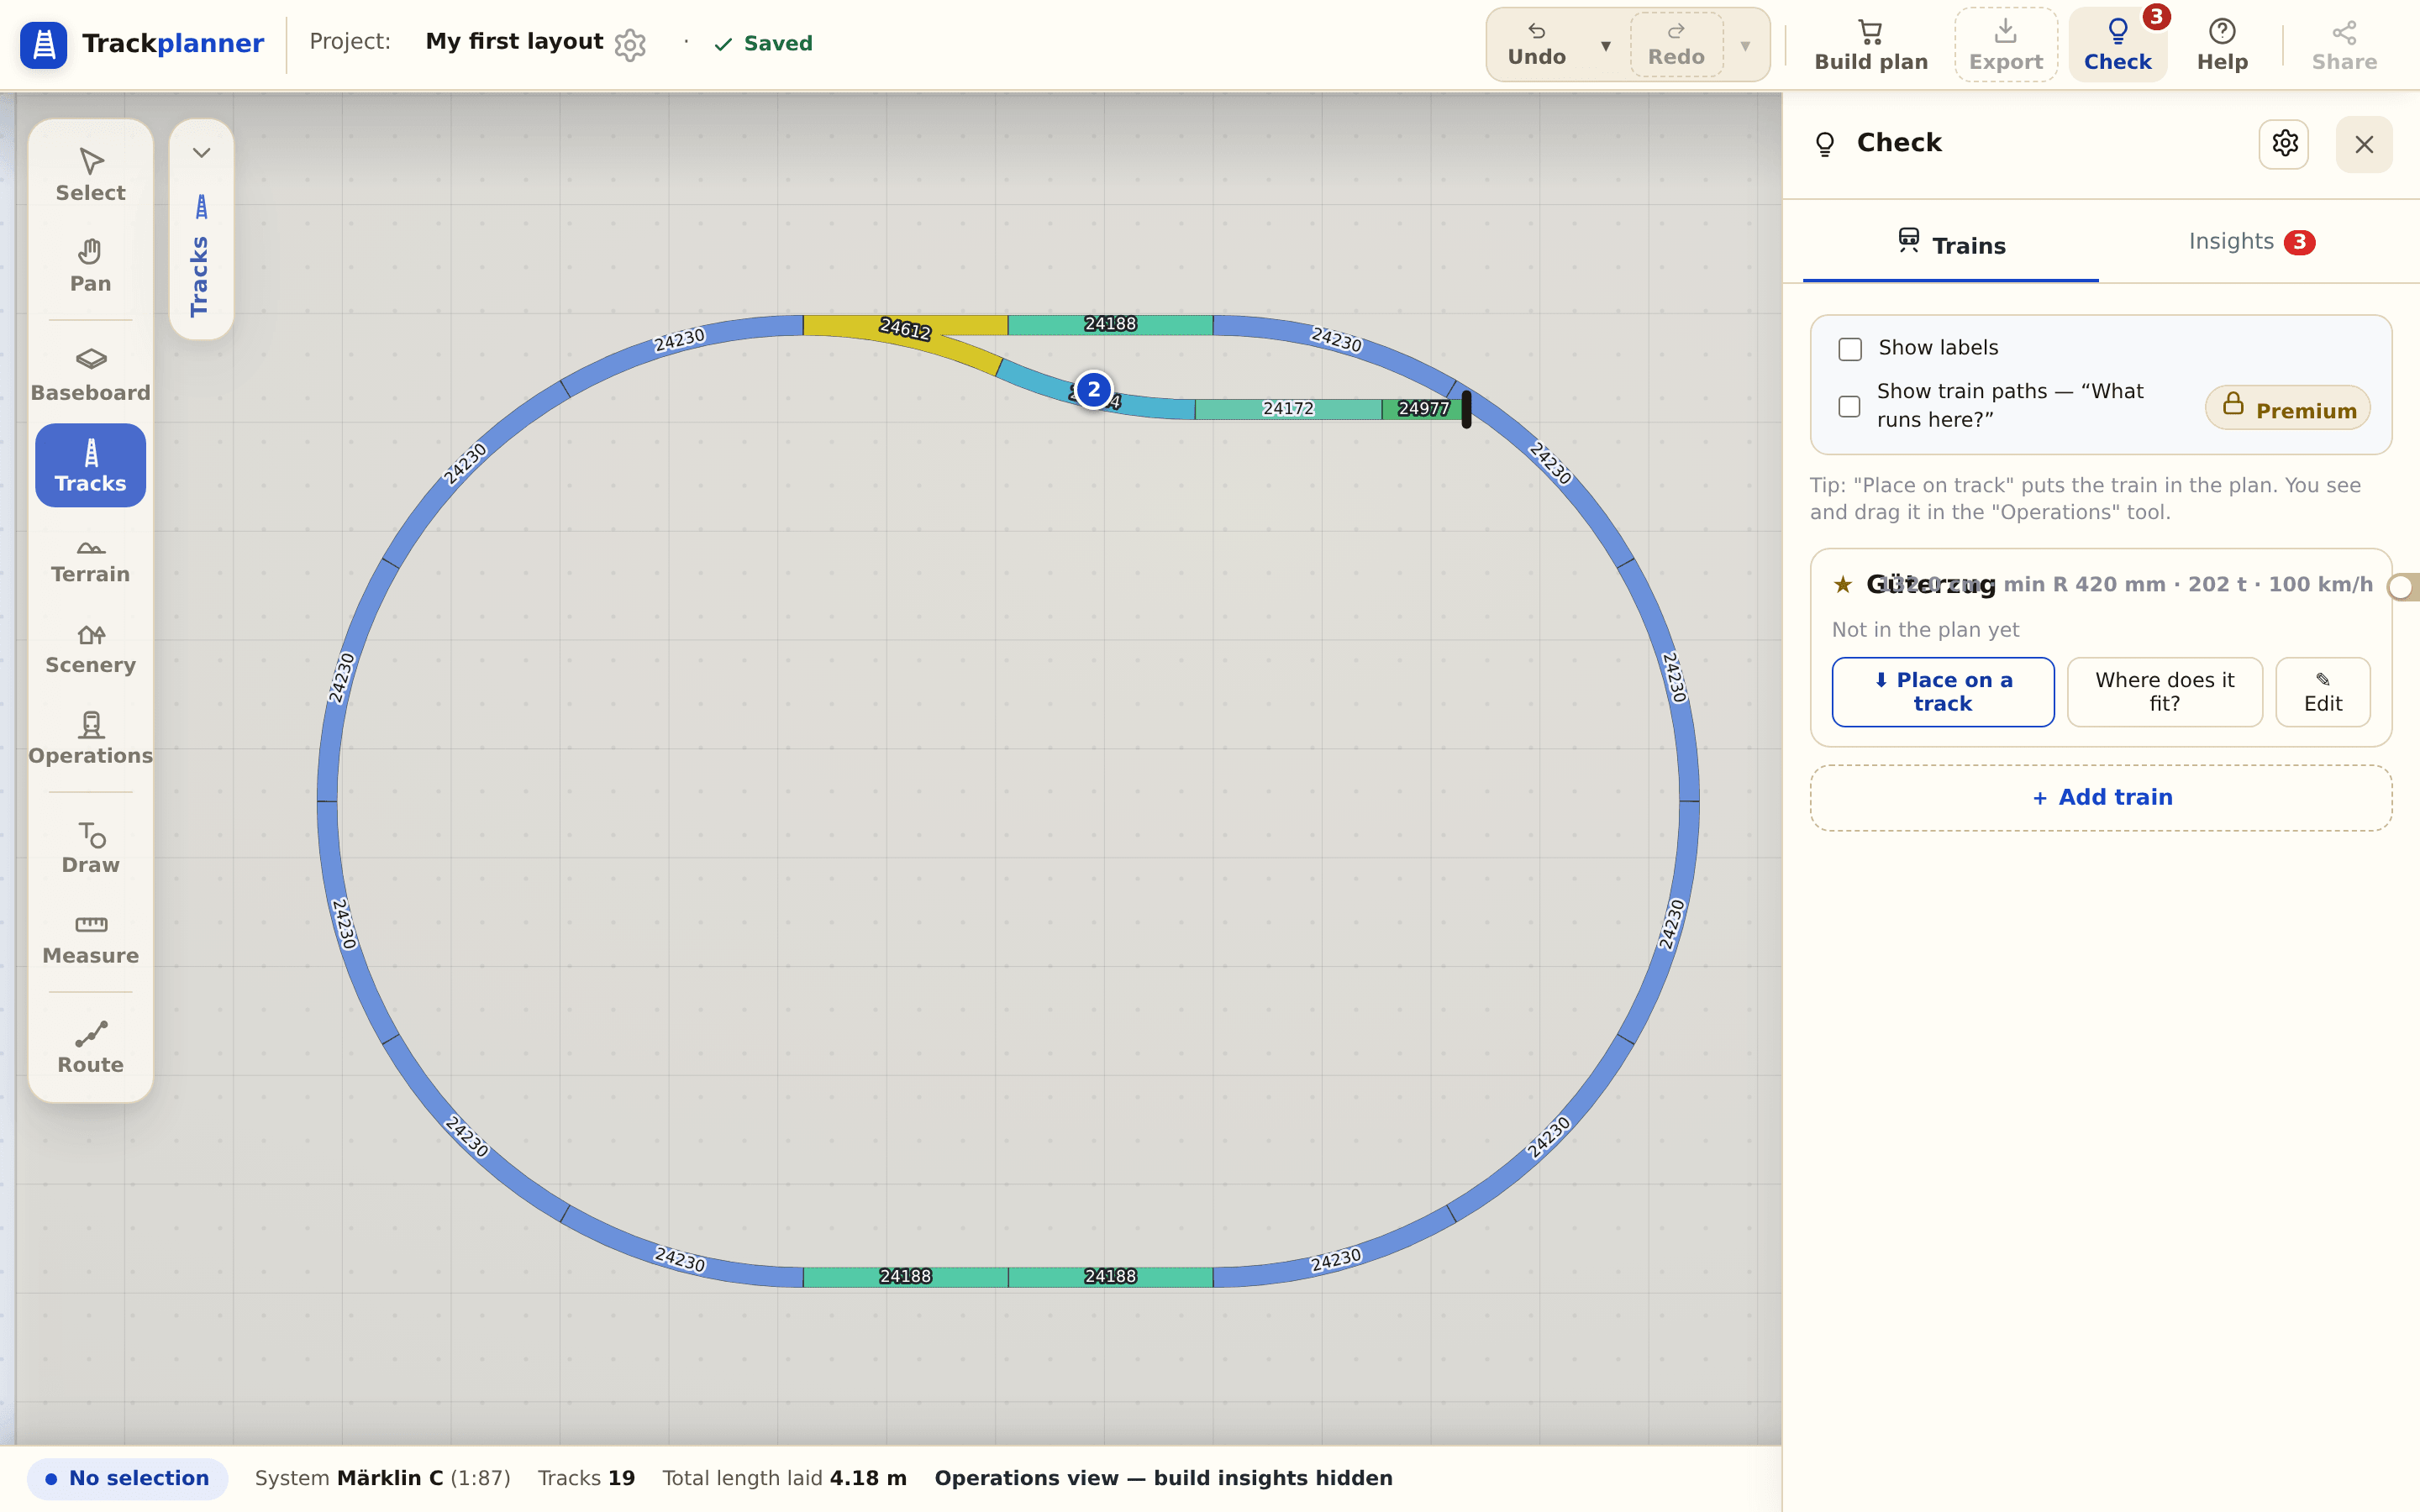
Step 2 — Placing on the rails
Drag the train from the train card onto a track. The fit check shows immediately whether it fits — and whether it’s standing on a siding with an overhang.
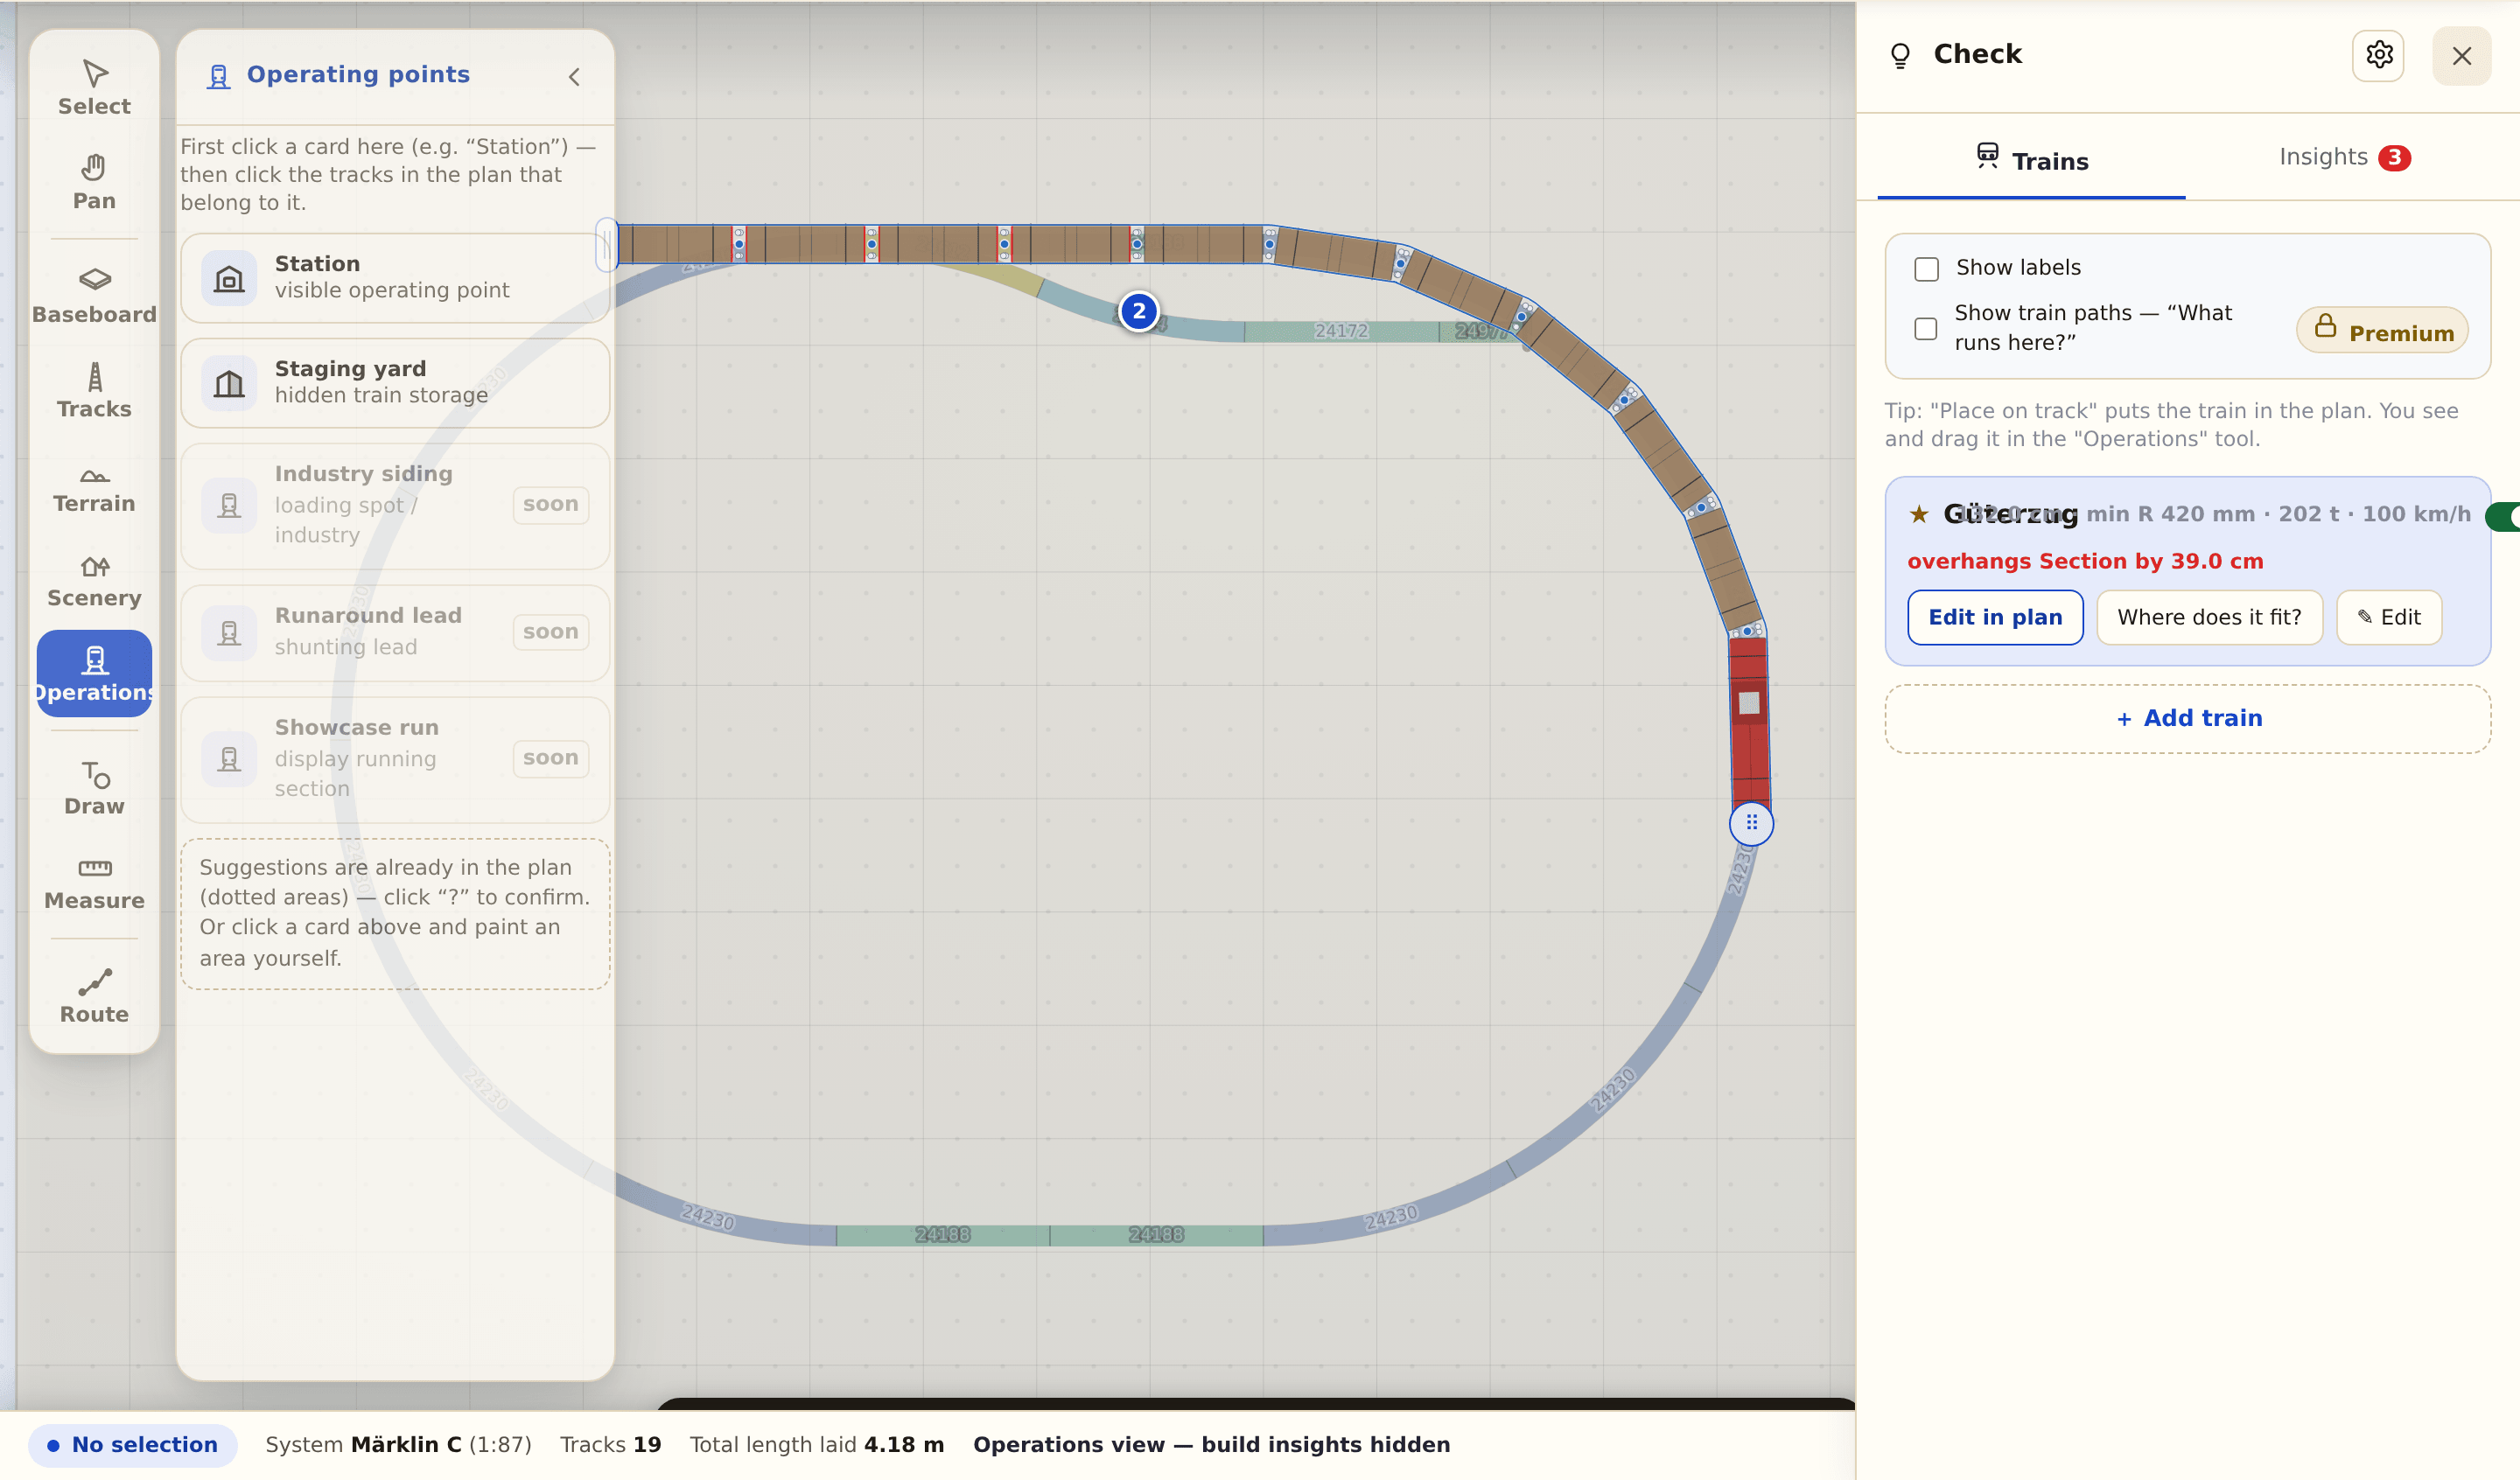
Step 3 — The pro’s eye
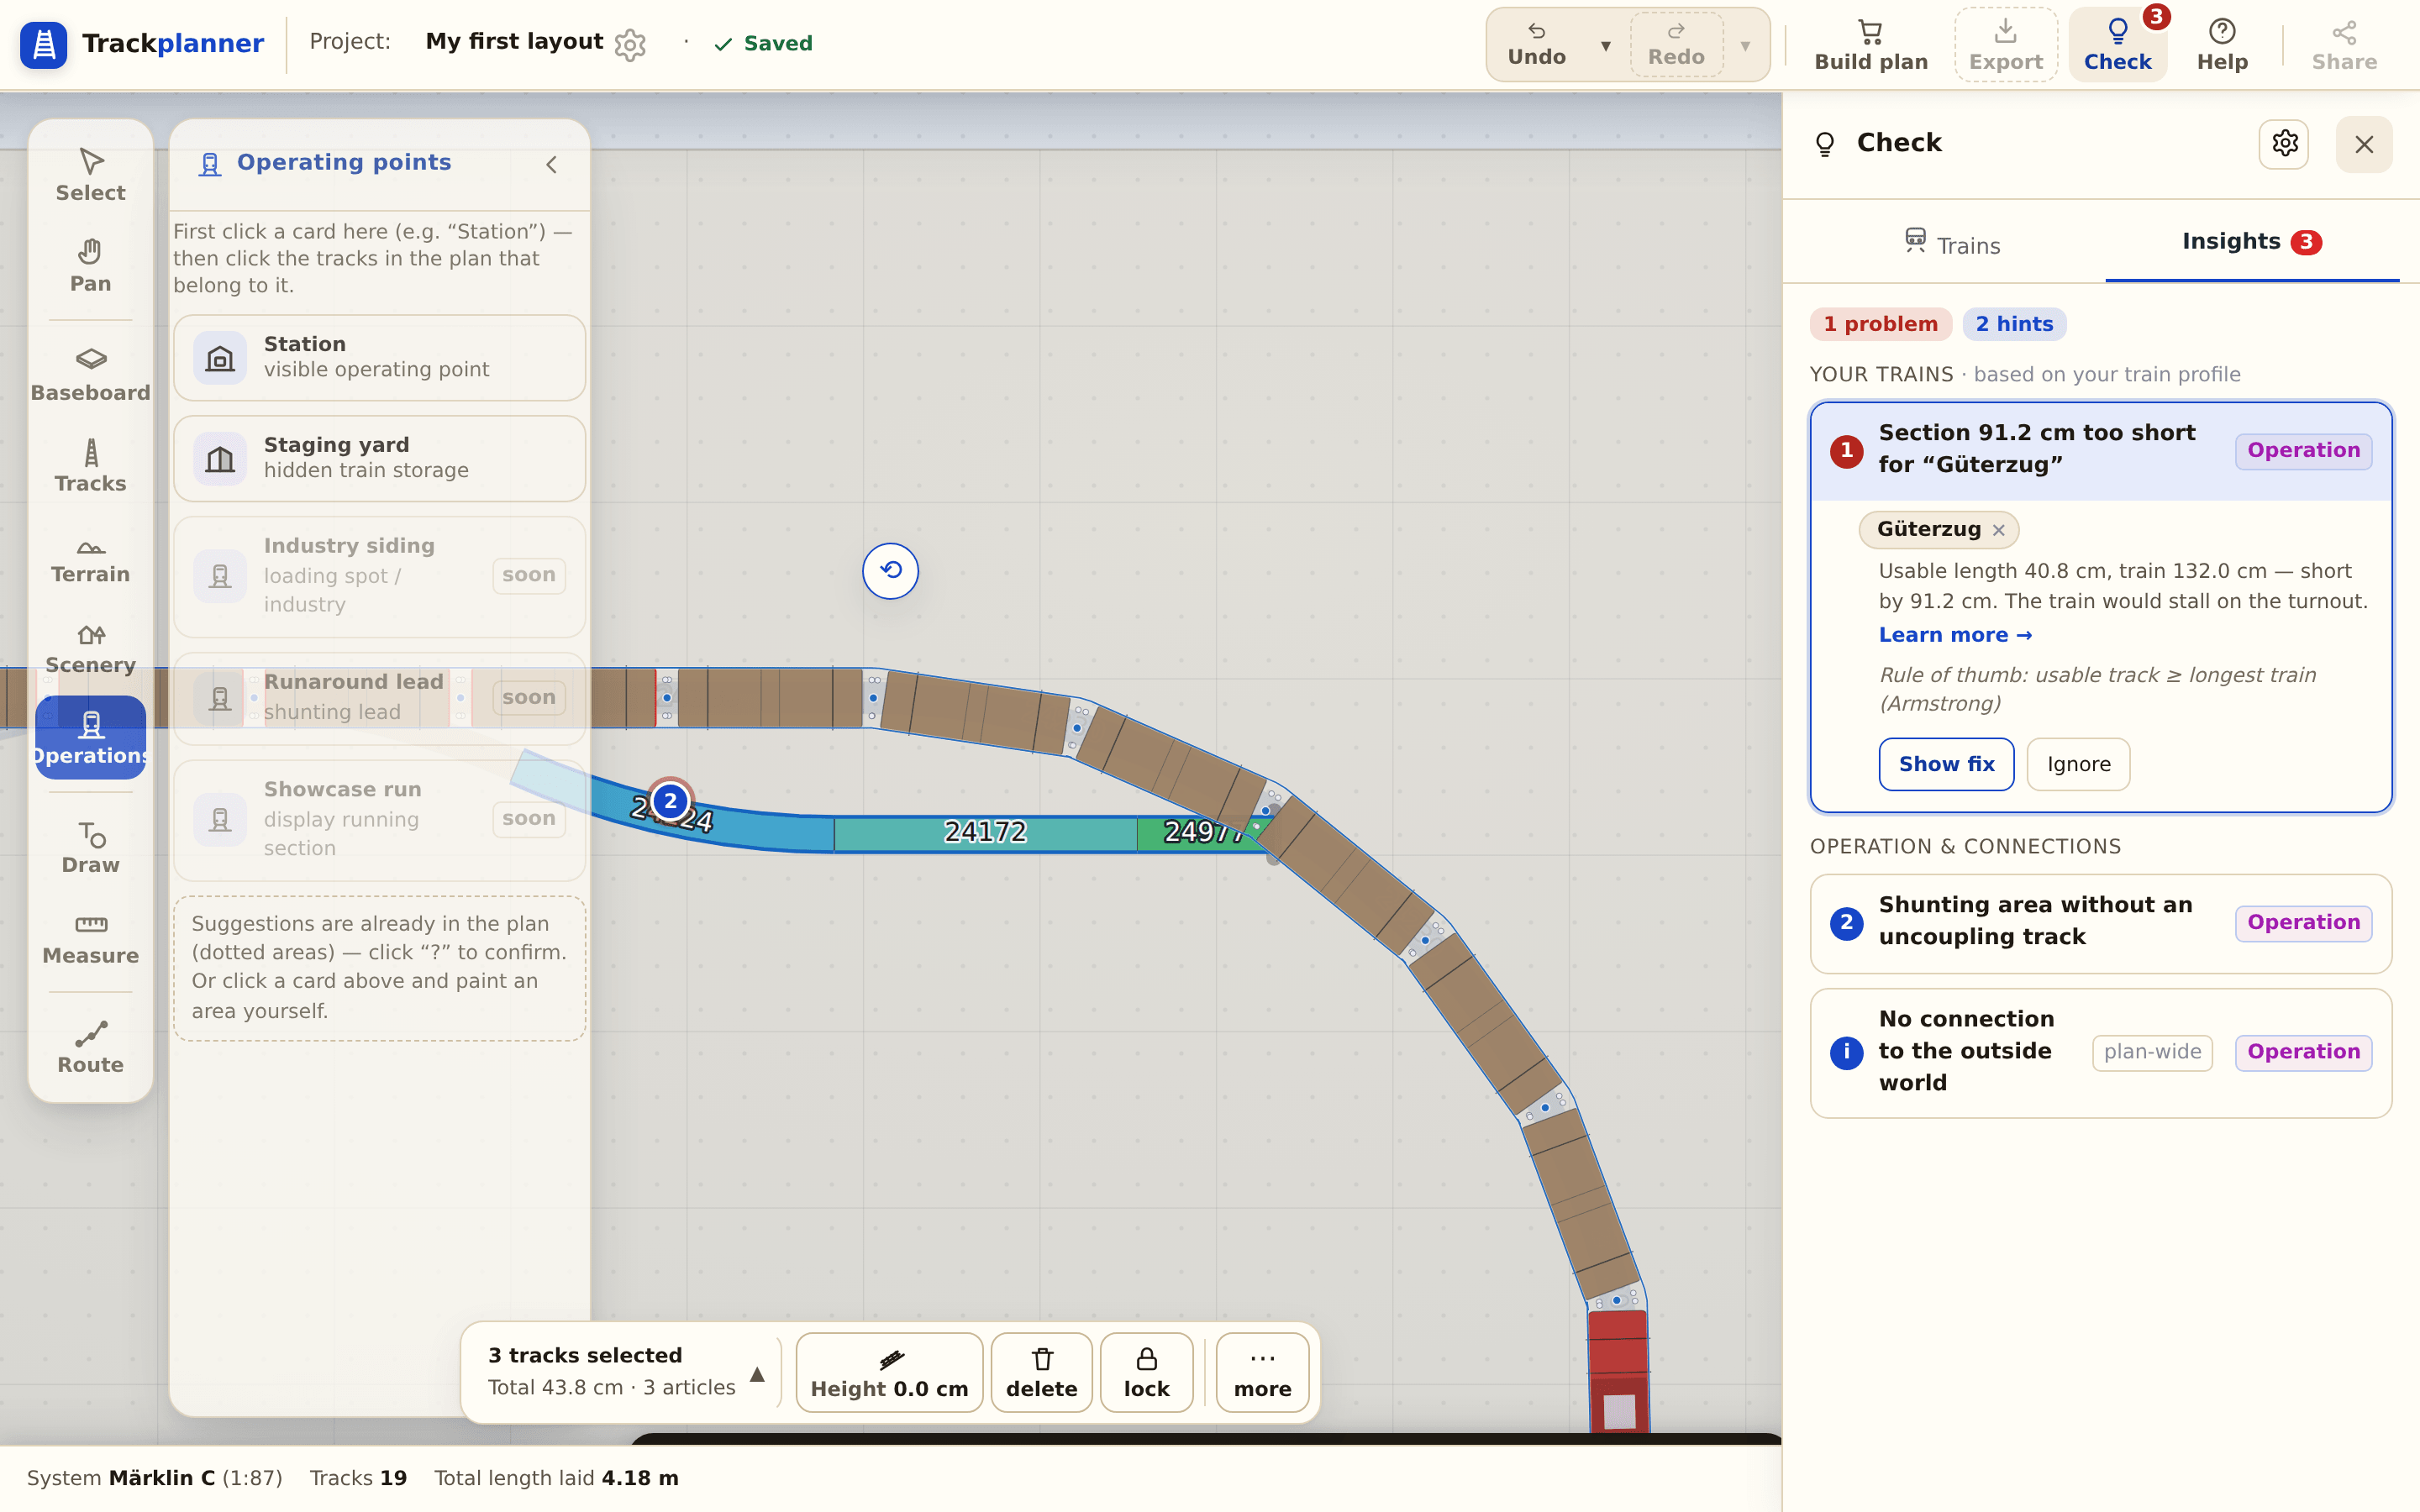
Tap a finding in the plan check — the affected spot lights up in the plan. That’s how you find curves too tight, sidings too short or ramps too steep before you build. And if there’s nothing to complain about: not many manage that.
What’s next?
- More on this: Minimum radius · Usable siding length · Grade.