Reversing loop around the hill
Work in progress: This section is still a work in progress — content is being added and revised continuously.
A reversing loop routes the line so the train ends up running the other way — handy for changing direction, but a small electrical challenge. In this part you build one and understand why the plan check flags it on two-rail track.
Starting point: your base oval from Part 1 — you hang the loop off its line on the outside. (Every part of the series builds on the oval, not on the previous one.)
Step 1 — The loop
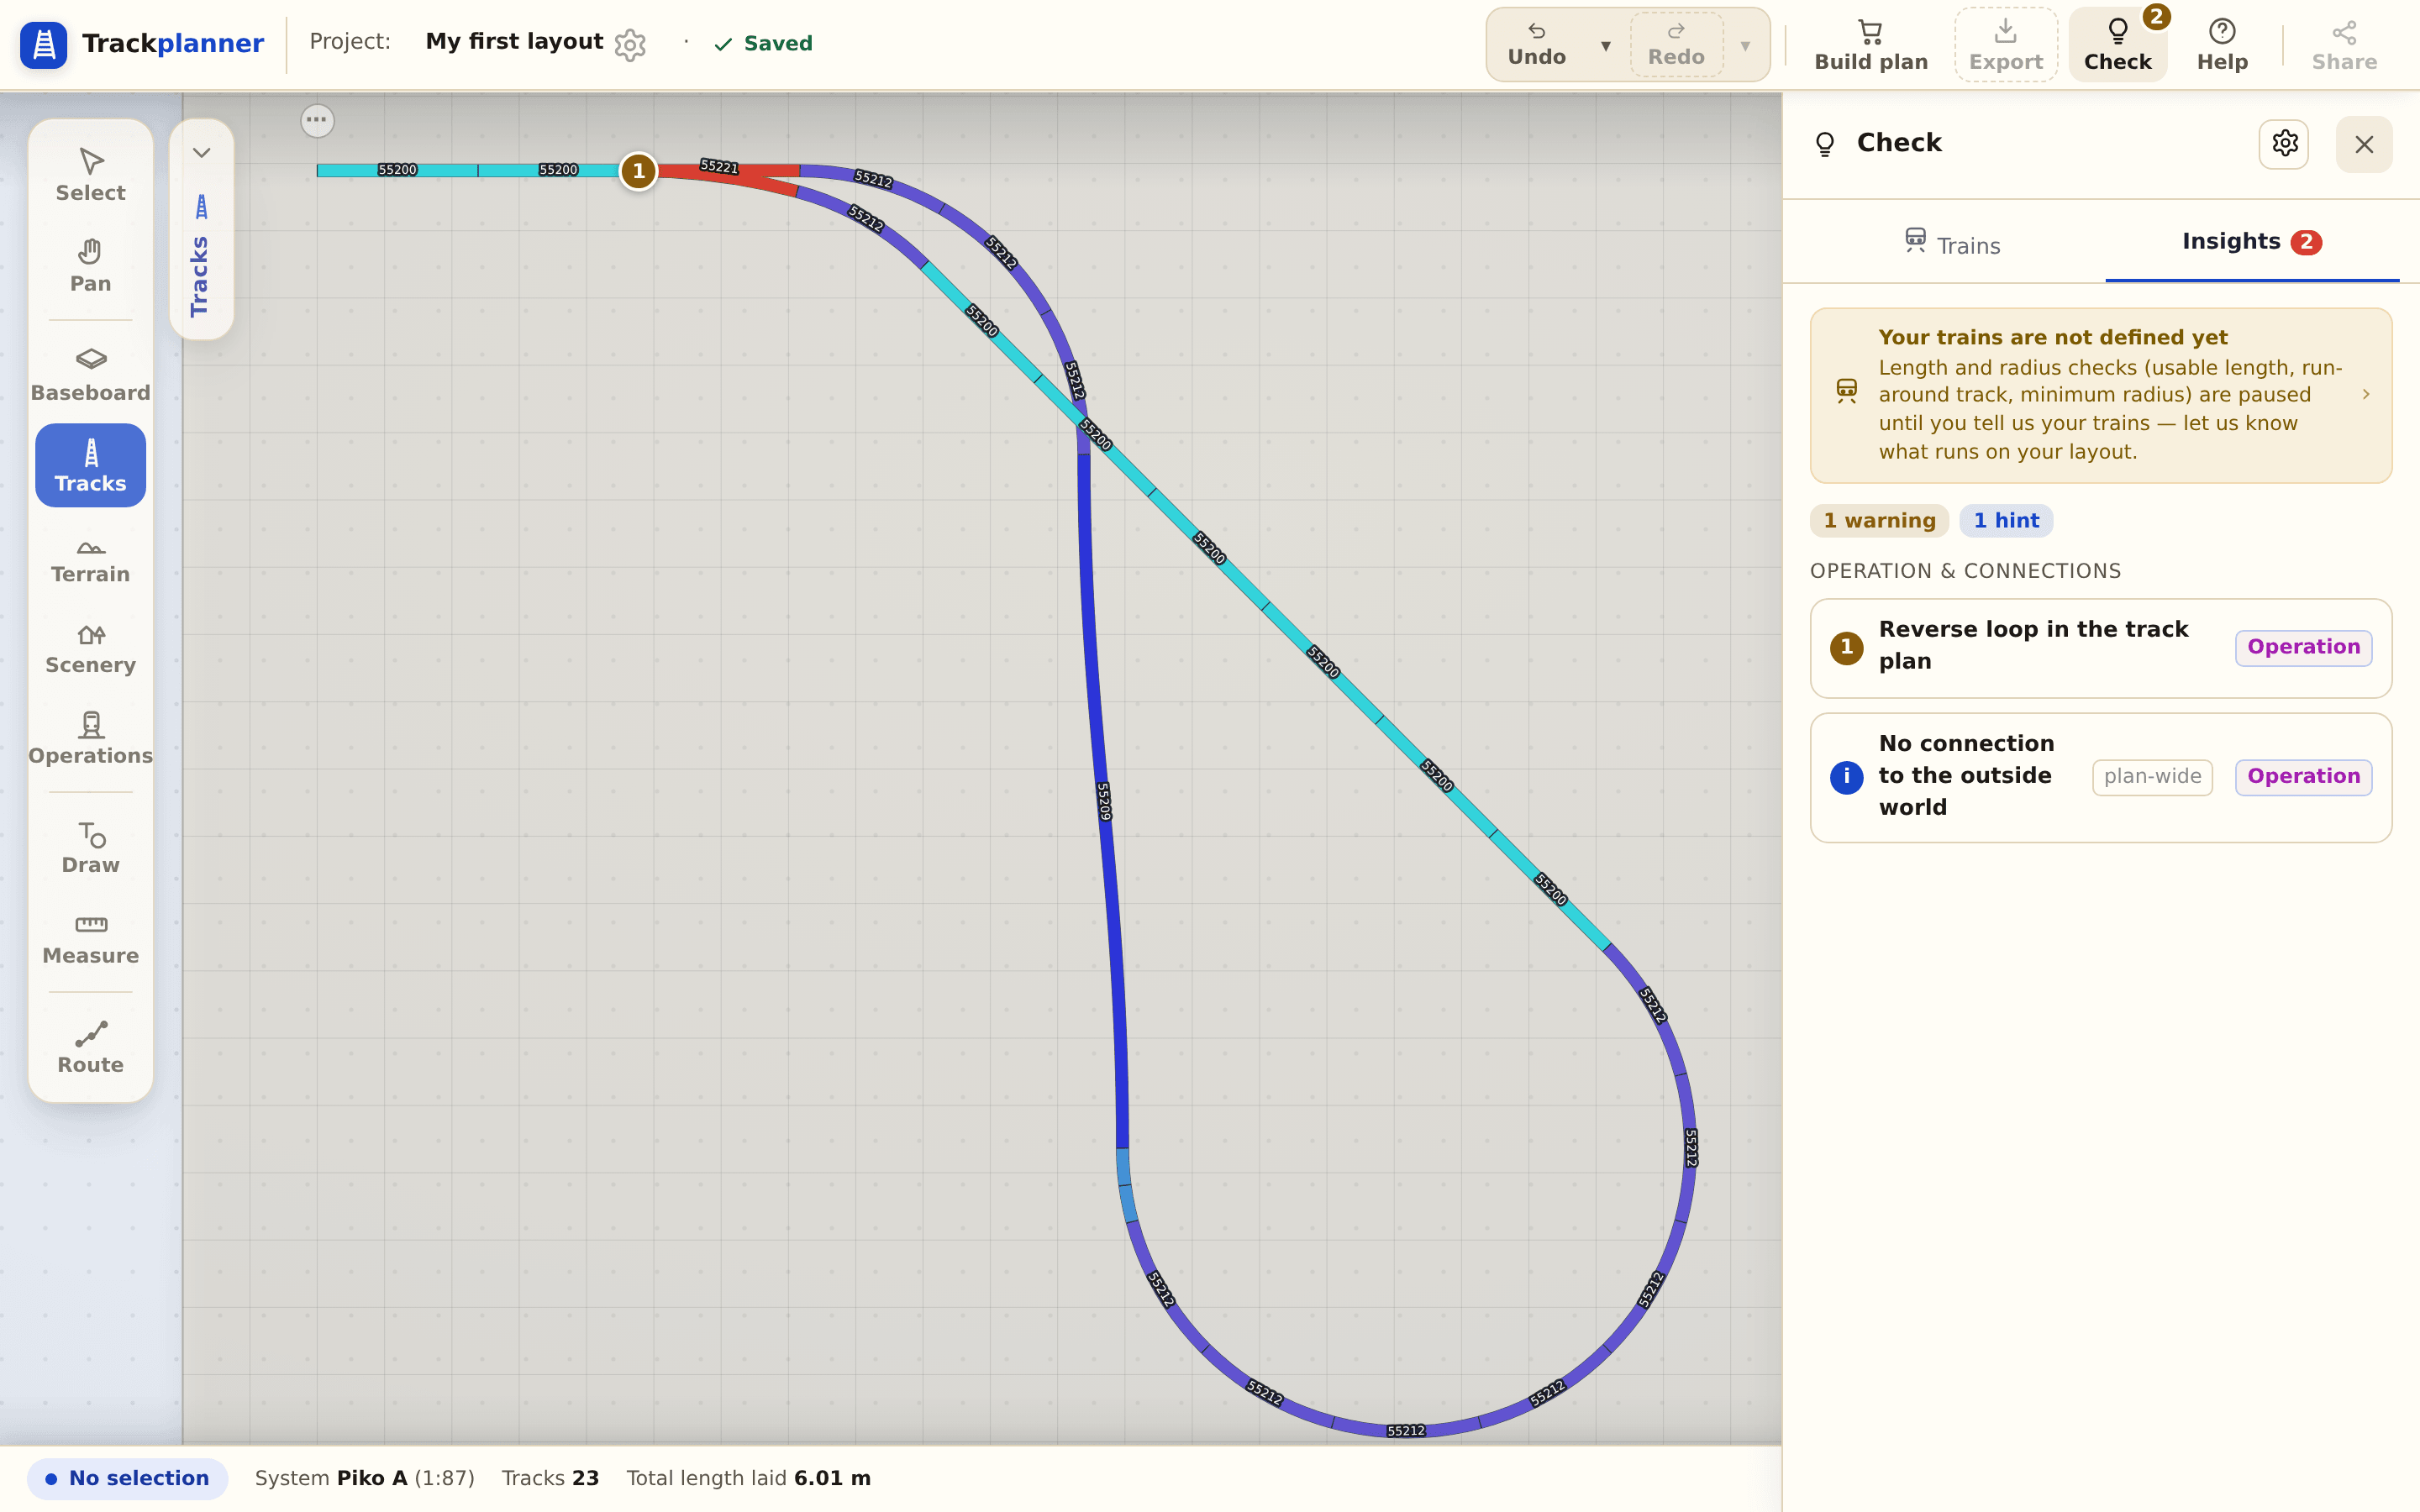
From a turnout on your line, run a curve around the outside and back onto the same line — the train comes out facing the other way. As soon as the loop closes, the plan check reports a reversing loop — which is exactly what you just built. Here the finding isn’t an error, it’s the success signal. (On three-rail track such as Märklin C the plan check stays silent: the polarity problem does not exist there.)
Step 2 — Why the polarity flip?
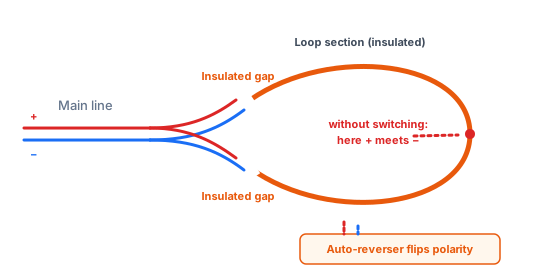
In a reversing loop the outer rail meets the inner rail somewhere — with DC that would be a short circuit. On the real layout you isolate the loop section and reverse its polarity at the right moment (with digital control a reversing-loop module handles this automatically). For the plan it’s enough to know: a polarity flip is needed here.
Step 3 — The finding as a cheat sheet
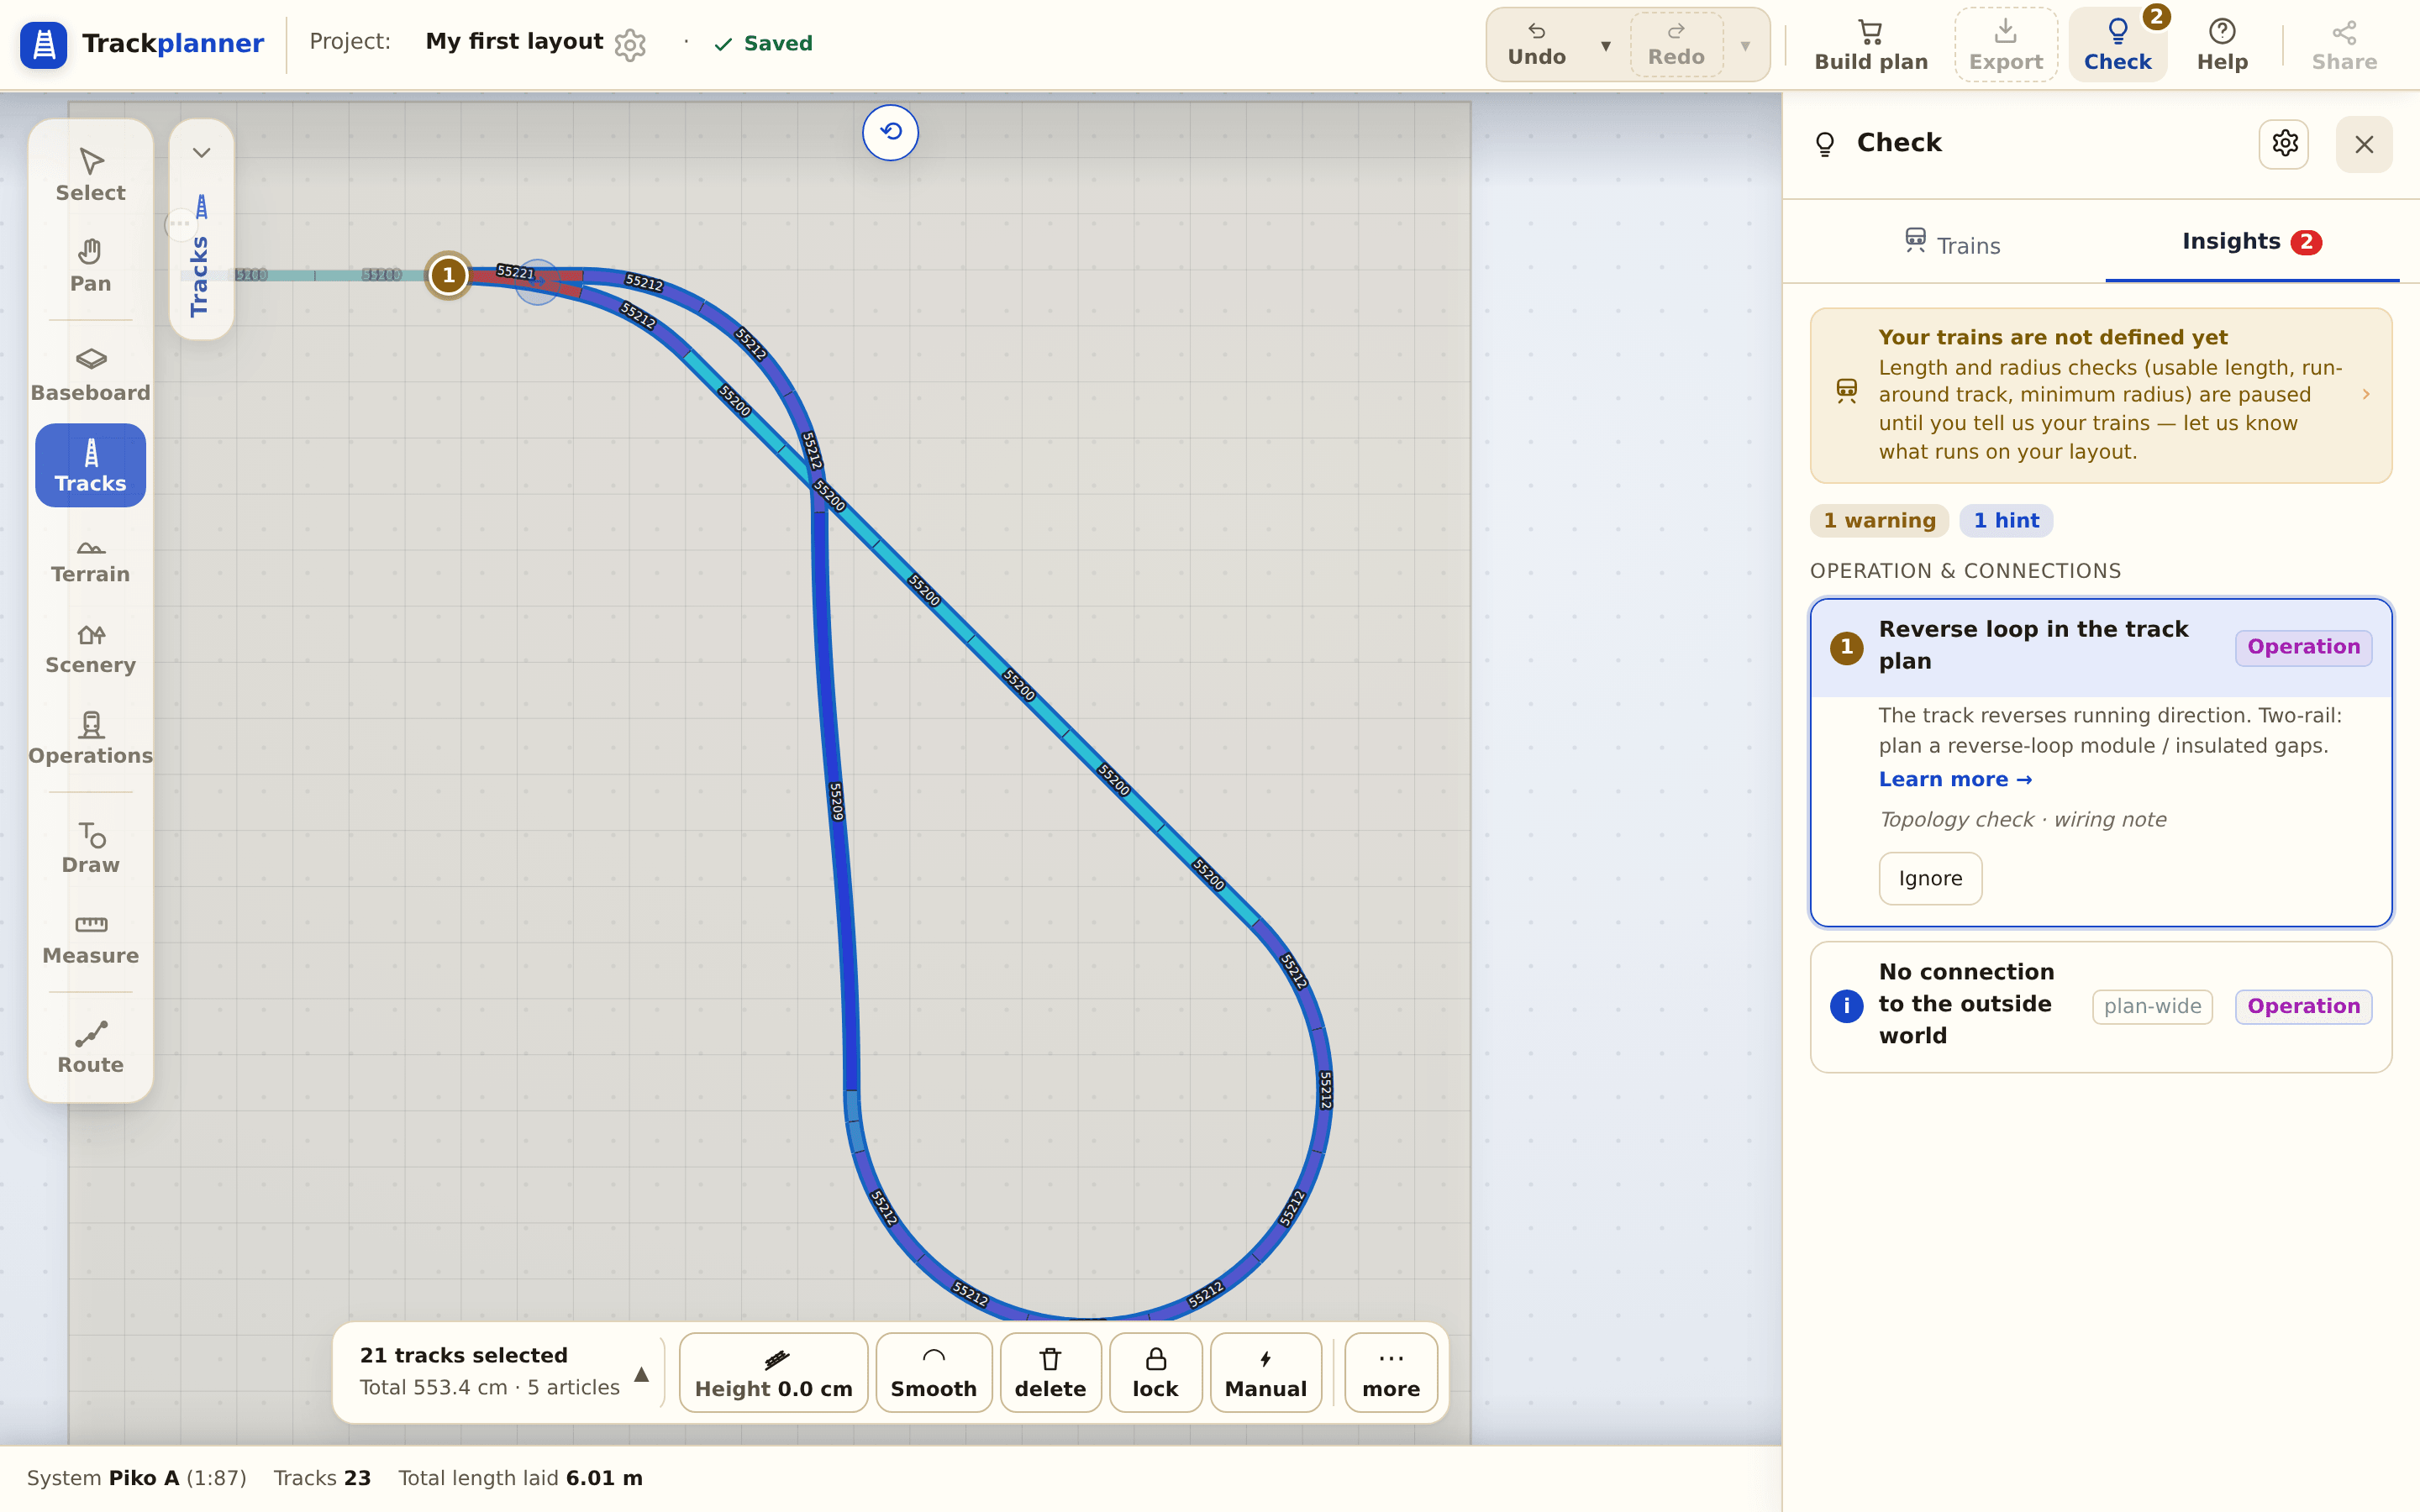
Tap the reversing-loop finding in the plan check (on three-rail track there is none, see step 1): the loop lights up in the plan, and the entry explains in one sentence what to do on the real layout (plan for a reversing-loop module or isolation gaps). “Learn more” takes you to the detailed rule page.
What’s next?
- Part 4: Double-track main line — a second track alongside.
- More on this: Reversing loop (rule) · Reversing loop (glossary).